There’s something about a piñata that instantly screams "celebration," and the best part? It’s surprisingly easy to create your own DIY mini piñata that fits perfectly with any theme! For our recent sky-themed birthday bash, I was absolutely obsessed with these adorable mini cloud piñatas. Sure, they take a bit of patience, but trust me—grabbing some supplies and settling in front of the Hallmark Channel for a cozy crafting session is totally worth it. I’m not the only one who turns to those feel-good movies for crafting inspiration, right? Plus, making your own piñata can save you a ton of money. Since I already had most of the materials on hand, these little clouds ended up costing me less than a dollar!

Here’s what you’ll need:
– Cardstock paper or poster board
– Masking tape
– Scissors
– School glue
– A pen or pencil
– Tissue paper (whatever colors you like!)
– String or twine
And here’s how you do it:
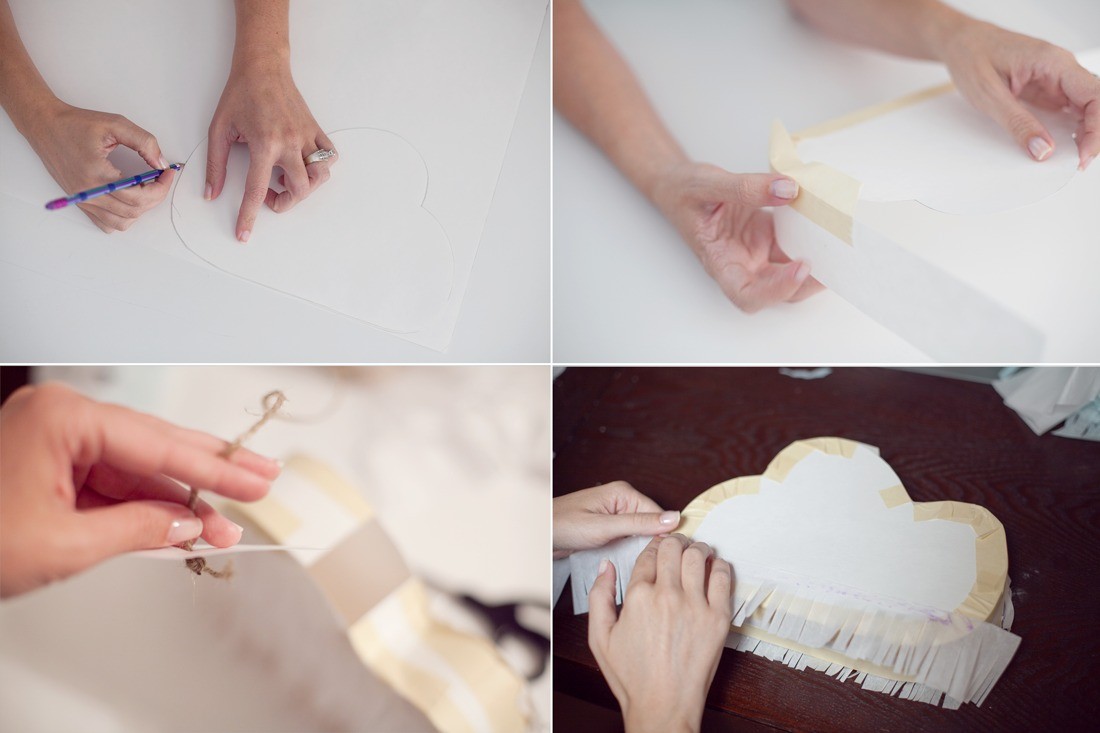
Step One: Start by drawing your desired shape (I went with a cloud) onto your poster board or cardstock and cut it out. Use this template to trace and cut out a second identical shape. These will serve as the front and back of your piñata. From your leftover paper, cut long strips about 1.5 inches wide. If you're using poster board, cutting the strips lengthwise will give you longer pieces to work with.
Step Two: Take your masking tape and wrap the strips around the edges of your first cloud shape, starting from the bottom and working your way up. Continue taping until you reach the top, leaving about 2 inches open at the top. This will be where you insert the candy later. Repeat the same process on the backside of the piñata with your second cloud shape.
Step Three: Now it's time to fill your piñata! Pour in your candies or small treats. Cut a strip of paper slightly longer than the opening at the top, poke a small hole in it, and thread your string or twine through the hole, tying a thick knot underneath. Attach this strip over the opening using masking tape to secure it tightly. This loop will hold the weight of the piñata when you’re ready to hang it.
Step Four: To add that fluffy, festive look, cut strips of tissue paper about 1.5 inches wide. Score the paper to create a fringe effect without cutting all the way through, leaving about ¼ inch uncut at the top. Once you’ve got enough fringed tissue paper, start gluing it onto your piñata, beginning at the base and working your way upward, overlapping as you go. Do the same for both the front and back, then trim any excess before gluing strips around the sides. Trim the edges as necessary to keep everything neat and tidy.
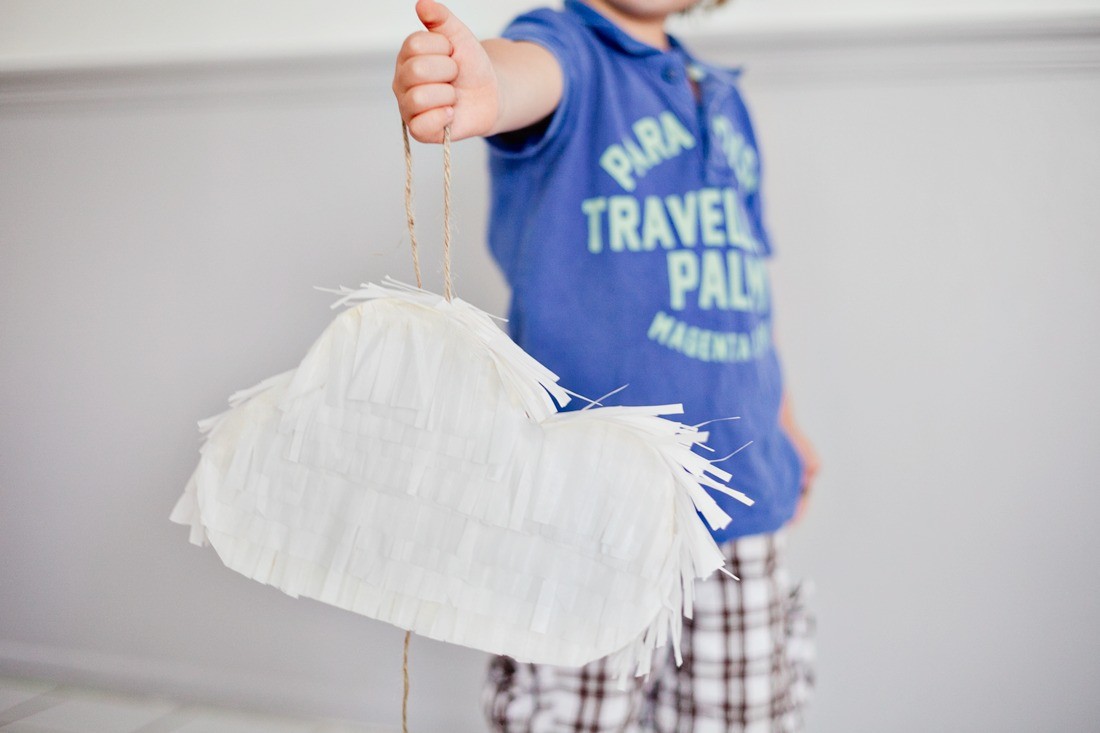
These little cloud piñatas turned out so darn cute, and honestly, they were such a blast to make! I’m already brainstorming other shapes and themes to try next time. Stay tuned—I promise there will be more crafting fun coming your way soon! If you missed out on our Confetti Popcorn recipe with free popcorn box printables or our guide on how to make a smash cake, definitely check those posts out. More birthday party content is on the horizon, including tons of new photos!
xo

Skin Care Product,Led Light Therapy,Blackhead Remover Tool,Silicone Facial Cleanser Brush
Shenzhen Jie Zhong Lian Investment Co., Ltd. , https://www.szmeizon.com